Launch P6 database Tool
Set up database connection
Backup your Primavera P5/P6 database
Restore Primavera database
Fix Oracle database
Fix Event Code
Fix P6 Login problem
Reset global default calendar
Copy/migrate Primavera projects
Copy project codes, activity codes, resources
codes, UDFs, or cost accounts
Schedule to backup Primavera P6 database
Primavera P6 database Tool user manual
Disclaimer: We will not be responsible to any data loss due to using this tool, and it is in your own risk to use it.
Prerequisites to launch Primavera P6 Database Tool
Microsoft .NET Framework 4.0 or later is required to run Primavera P6 Database Tool.
This tool supports MS SQL Server, SQLite, and Oracle database. It's better for you to run P6 Database Tool from the PC where Primavera P6 is installed.
Please be aware if you are using 64-bit Windows, and are connecting to an Oracle database, download 64-bit Oracle InstantClient Version 11.2 or later and install it in your system.
Also, the SQLite .NET library (System.Data.SQLite.dll) bundled with this tool is 64-bit, if you are running in a 32-bit PC, please copy the file (System.Data.SQLite.dll) in the "SQLite\x32" folder to the parent folder of this tool, and overwrite the existing file.
To run Primavera P6 Database Tool, just open the executable file named PrimaveraDBBR.exe, there is no installation or configuration required to launch this tool.
1. Set up Primavera database connection.
After launch the P6 Database Tool, it's better to set up database connection first. There are two ways to set up the connection. The first way is to click the "Set Database Connection" button, then select the database engine type (Oracle, SQL Server, or SQLite)for Primavera. If you don't know the hostname, instance, database, username, and password, please don't enter them, the P6 Database Tool will pick the default settings. Next click the "Test Connection" button to make sure the connection is successful; if the connection failed, you have to change the settings again until the test connection works. Finally click the "Save" button to store the settings permanently.
The second way to set up connection is to let this tool to find the settings automatically, and it's the better way if P6 Professional Client or P6 Web Access is installed in the same PC. To use this way, click the "Misc" menu, then, select "Export Codes", then the screen below appears.
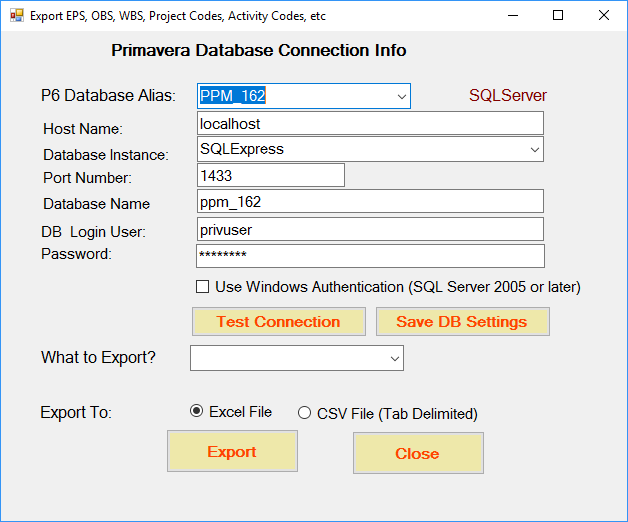
From the P6 Database Alias dropdown, select the alias you pick when you run P6 Professional Client. Then, this tool will fill out the rest fields automatically. Click "Test Connection" button, and you should see the successful message. Finally, hit the "Save DB Settings" button to store for the future use.
2. Backup your Primavera P5/P6 database.
   - First, run the application, click on the "Set Database Connection" button,
     then select the database engine type (Oracle, SQL Server, or SQLite)for Primavera.
     If you don't know the hostname, instance, database,
     username, and password, please don't enter them, the P6 Database Tool will pick the default
     settings. Click the "Save" button to store the settings permanently. Then click the "Test
     Connection" button to make sure the connection is successful; if the connection failed,
     you have to change the settings again until the test connection works.

   - After the settings are correct, click the "Backup Database for P5/P6" button, and
     confirm your action. This takes some time to complete depending on the size of your database.

   - Verify that the database backup exists in the same folder as PrimaveraDBBR. The backup file
     is called .bak; for example, if the database you need to backup is called
     PMDB$Primavera, then the backup file should be PMDB$Primavera.bak.

   - To see what databases or Oracle schemas exist in the server, click the Test Connection,
     it will give you a list of existing databases or schemas.
3. Restore database
   - As with the backup procedures, you must make sure the settings are correct.
     You can verify this by simply clicking the "Test Database Connection",
     and if there are no error reports, you can proceed with the restore action.

   - Clicking the "Restore P5/P6 DB" button will start the restore operation.

   - You may get the backup file from one PC, then restore it in a differect PC
     without any problem.
4. Fix Oracle database
If you found you can't connect to Oracle database, the Fix Oracle Database feature may help you to resolve the Oracle database issues.5. Fix Event Code error
You need to set up the database connection successfully first, then select Fix Event Code Error from the proper database menu. For example, if your P6 database is Oracle, click Oracle, then click Fix Event Code Error.6. Fix P6 Login problem
You probably saw such message before: This user is already logged in, please use another login name. You can use P6 Database Tool to fix such an issue. You need to set up the database connection successfully first, then select Fix P6 Login problem from the proper database menu.7. Set User Login Session audit.
By default, P6 only preserve 5 days user login sessions, if you want to change the days, click Misc menu, then select Set KeepInterval for USESSAUD.8. Reset global default calendar or fix two default calendars
You may get an error when you change the global default calendar, error message says: 2DVWV-3590-8 2 default values within VDBE. Should only be one default value for base calendar. If you encounter two default calendars error, you can use this utility to fix it.9. Migrate or copy Primavera Projects
You can use this tool to copy Primavera projects from high version of Primavera to low version of Primavera, and vice versa. Or, you van migrate your projects from Primavera PPM (Project Professional Management) to EPPM (Enterprise Project Portfolio Management) without missing any data or project codes. You can also copy projects from Oracle Primavera database to SQL Server database, and vice versa.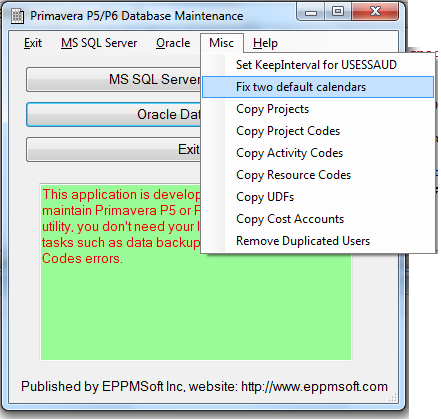
To use this function, click the "Misc" menu, then select "Copy Projects" function, and that brings up the "Copy Projects" process.
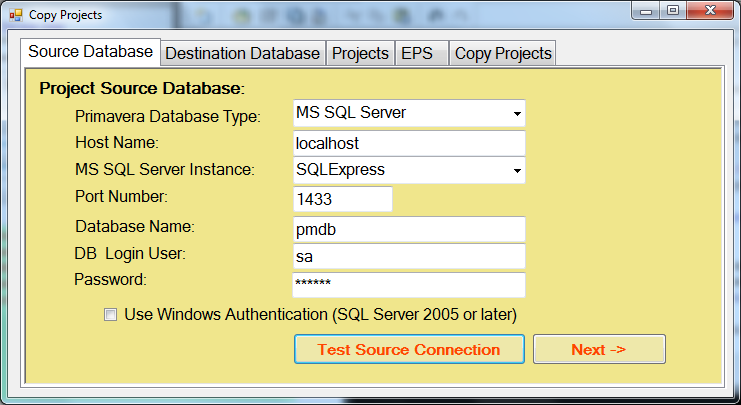
In the "Source Database" screen, enter appropriate Primavera database connection info, then hit the "Test Source Connection" button to make sure the connection is successful, then click the "Next" button.
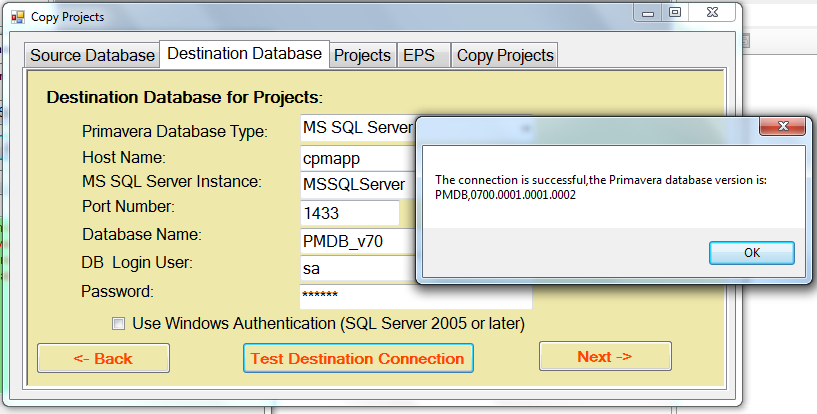
In the "Destination Database" screen, enter appropriate Primavera destination database connection info. and hit the "Test destination Connection" to make sure the connection is successful, then click the "Next" button.
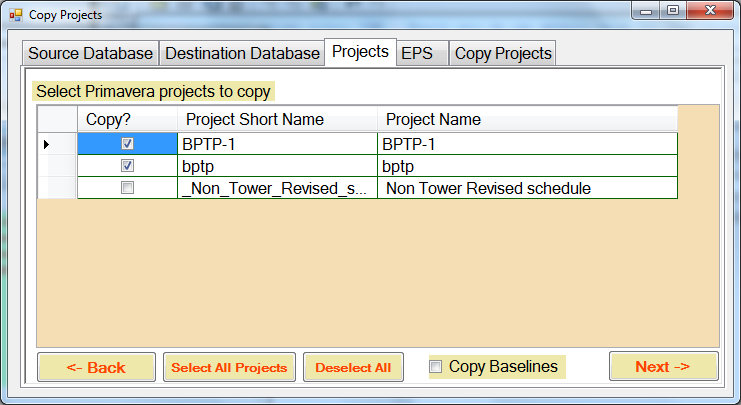
In the "Projects" screen, check the projects to be copied, and you can also check the "Copy Baselines" option in the bottom if you want the baselines are being copied, then click the "Next" button.
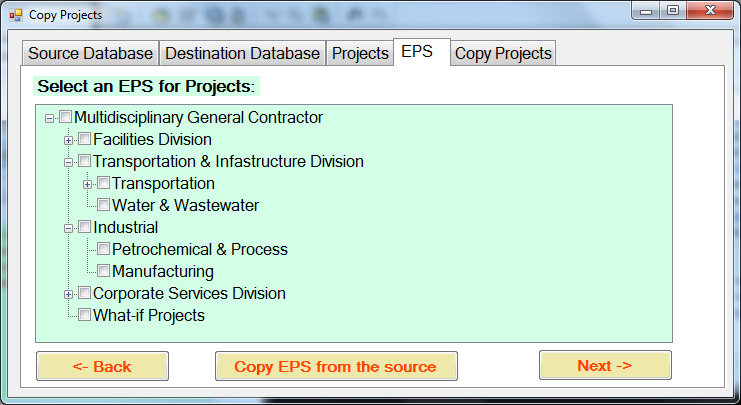
In the "EPS" screen, check the EPS node in the destination for the projects, and if you want to copy the EPS from the source to the destination, click the "Copy EPS from the Source" button, then click the "Next" button.
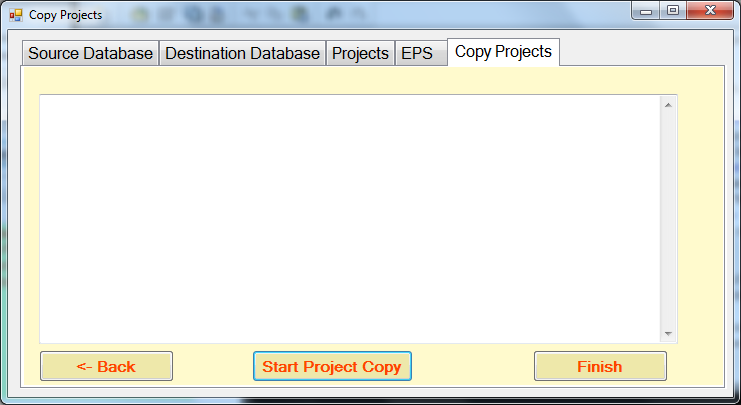
Now, in the final "Copy Projects" screen, click the "Start Project Copy" button, wait for complete, and finally click the "Finish" button.
10. Copy project codes, activity codes, resources codes, UDFs, or cost accounts
You can easily copy project codes, activity codes, resources codes, UDFs, or cost accounts from one Primavera database to another, just follow the same procedures as the Migrate or copy Primavera Projects.11. Schedule to run this application automatically.
To run this application according your schedule to backup your databases, you need to use Windows Schedule.
   Here are the steps:
   1).Click Windows Start|All Programs|Accessories|System Tools|Scheduled Tasks

   2).In the Scheduled Tasks window, double click the [Add Scheduled Tasks] item.

   3).That brings up the [Scheduled Tasks Wizard]; click the [Next] button.

   4).When you see [Click the program you want Windows to run], hit [Browse] button.

   5).Browse to the folder with PrimaveraDBBR.exe file. When the wizard moves up to
      the [Type a name for this task], you may change the default name - PrimaveraDBBR,
      and select the time frame(daily,weekly) in the [Perform this task] section, and
      click the [Next] button.

   6).In the [Select time and day you want this task to start] wizard, enter the desired
     start time and start day, and hit the [next].

   7).In the [Enter the name and password of a user] wizard, type in the user name and
     password to run this task, and hit the [Next] button.

   8).In the [You have successfully scheduled the following task] wizard, check the
     [Open advanced properties for this task when I click finish] option, and hit [Finish].

   9).When the advanced properties for the PrimaveraDBBR task appear, select the [Run:] field,
     and type " -backup" in the end of the field (keep the orginal path),
     and it should read similar to the line below:
      C:\backups\PrimaveraDBBR.exe -backup

     If you like to bacup multiple databases, use the -databases parameter, for example:
         C:\backups\PrimaveraDBBR.exe -backup -databases:"db1,db2,db3"
     The command above will back up these three databases: db1, db2, and db3.
   10).Finally, click [OK] to complete the task setup.
Check your folder in which PrimaveraDBBR.exe is located, and the backup file should exist, if the schedule works, otherwise the schedule task does not work.
13. Export Primavera Project Codes, Resource Codes, Activity Codes, UDFS, EPS, OBS, WBS, and Resources/Roles.
Click "Misc" menu, then select "Export Codes", now the Export Codes appears (see the screenshot below).
The "P6 Database Alias" dropdown lists all the database aliases you already configured for P6 Professional Windows Client if P6 Windows Client is already installed in the same PC as this tool.
Select the P6 database alias as the source for export, let's select "PMDB", now the rest fields, like Host Name, Database Instance, Port Number, Database Name, DB Login User, and Password are filled out automatically. Simply click "Test Connection" button, you should be presented with Connection Successful message. You must see "The connection is successful" message first, then you are able to export the data you want. From the "What to Export" dropdown, select the data you want to export, let's say I want to export OBS. Next, select the file format you want, you can export OBS as Excel File, or CSV File, the default export format is Excel file. Finally, hit "Export" button, and a dialog appears for you to choose where to save the Excel file, enter the location, and click "Save" to finsih.
13. Import Primavera Project Codes, Resource Codes, Activity Codes, UDFS, EPS, OBS, WBS, and Resources/Roles.
Click "Misc" menu, then select "Import Codes", now the Import Codes appears (see the screenshot below).
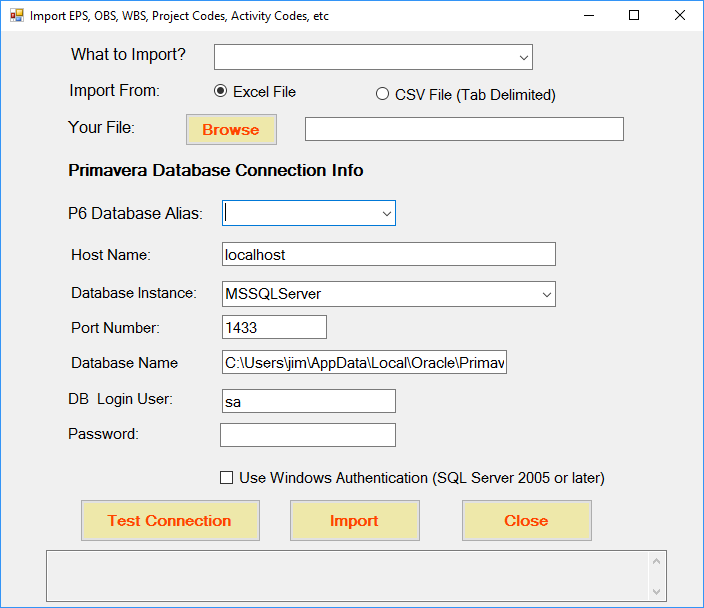
In the "What to Import" dropdown list, select the P6 gloabl codes you want to import, you can import Primavera Project Codes, Resource Codes, Activity Codes, UDFS, EPS, OBS, WBS, and Resources/Roles from Excel or CSV file into P6. Let's select EPS to import. Next, select the file format, the default is Excel. In the Primavera Database Connection Info section, select the P6 database alias as the import target, let say PMDB, then the other databse connection related fields, like Host Name, Database Instance, Port Number, Database Name, DB Login User, and Password are filled out automatically. If there is no P6 Professional Client installed in the PC, then you have to enter all fields (Host Name, Database Instance, Port Number, Database Name, DB Login User, and Password) manually, and hit "Test Connection" until you see the "Connection is successful" message. Finally, hit "Import" button to complete the import.
14. Removed duplicated Users.
If for whatever reason, you end up with duplicated users in Primavera P6, you can use this P6 database tool to fix it.
15. Check and consolidate Primavera Activity Codes.
If you have many projects in P6, and you import the P6 projects from different Project Managers, you will find there are so many redundant Activity Codes. For example, you may see the activity code named "Initial Study" being defined in over 10 projects as project level activity code, you may also think the "Initial Study" activity code should be promoted to Global Level to reduce the redundancy. P6 Database Tool gives you this ability to do so.
16. Remove User Preferences.
You need to remove user preferences in Primavera P6, if the user preferences are corrupted, and you cannot log into P6 any more. If you get Event Code error during P6 login process, 70% of chance, your profile is corrupted, and you should remove your user preferences from P6. With P6 Database Tool, you can easily remove user preferences.
17. Fixed Claim Digger or Update Baselines issue.
Claim Digger (Project Comparison) or Update Baselines is popular tool in P6, and a lot of porject planners and schedulers love them. But a lot of time, you are also hate them, because you cannot even launch Claim Digger (Project Comparison) or Update Baselines successfully. P6 Database Tool can help you to overcome this problem. The howto is the same as "Export Codes" or "Import Codes".
18. Fixed Project Copy and Paste issue.
There are bugs in Primavera P6 R15, when you copy and paste a project from one EPS to another, it fails. Sometime, the copy and paste are successfull, but the non admin super users cannot see the project listed in the target EPS. You can use this tool to fix this issue.